I had the good fortune of getting a spot in Will Myers’ Moravian Workbench class at the Woodwright’s school in early September (for more on the school, read the previous post).
Will is a self-professed hillbilly who happens also to be a scholar of the Shakers (and possibly other things as well), an accomplished woodworker, and a talented welder and auto body restorer…the kind of guy you’d want on your team in pretty much any challenge. He’s also a very patient and generous teacher…and he tells jokes.

Here's a photo of Will with the Legend, Roy Undehill (Photo by Daniel Hamden)
This was my first project-based class and the only experience I can compare it to is the one time I went on a chartered fishing trip in Alaska. On the fishing trip, the guides packed the boat, prepared the bait, found the fish, baited the hooks, cast the rod, and gave us the joy of just catching and landing the fish; the guides cleaned the fish, and unpacked the boat, etc. Here, you come into class with all the lumber pre-milled and ready to go; Will walks you through each step—no need to consult a plan or stare at the boards trying to figure out where to cut your joints. A lot of the guess and mule work is taken right out of the equation and you can just enjoy the best parts of the experience.
The project is a beast of a bench. You wouldn’t guess it by looking at it, or even by watching Will swing the pieces around in a video, but the individual parts (southern yellow pine and oak) are stout, and overall, the bench is pretty hefty. I have done a fair amount of woodworking, and some hand-cut joinery, but I had never done anything close to the scale of joints in this project, which included boring one-inch mortises through a four-inch thick hunk of southern yellow pine. I think we spent the better part of a morning boring and chopping those suckers. Make no mistake, you’ll feel that the next day.
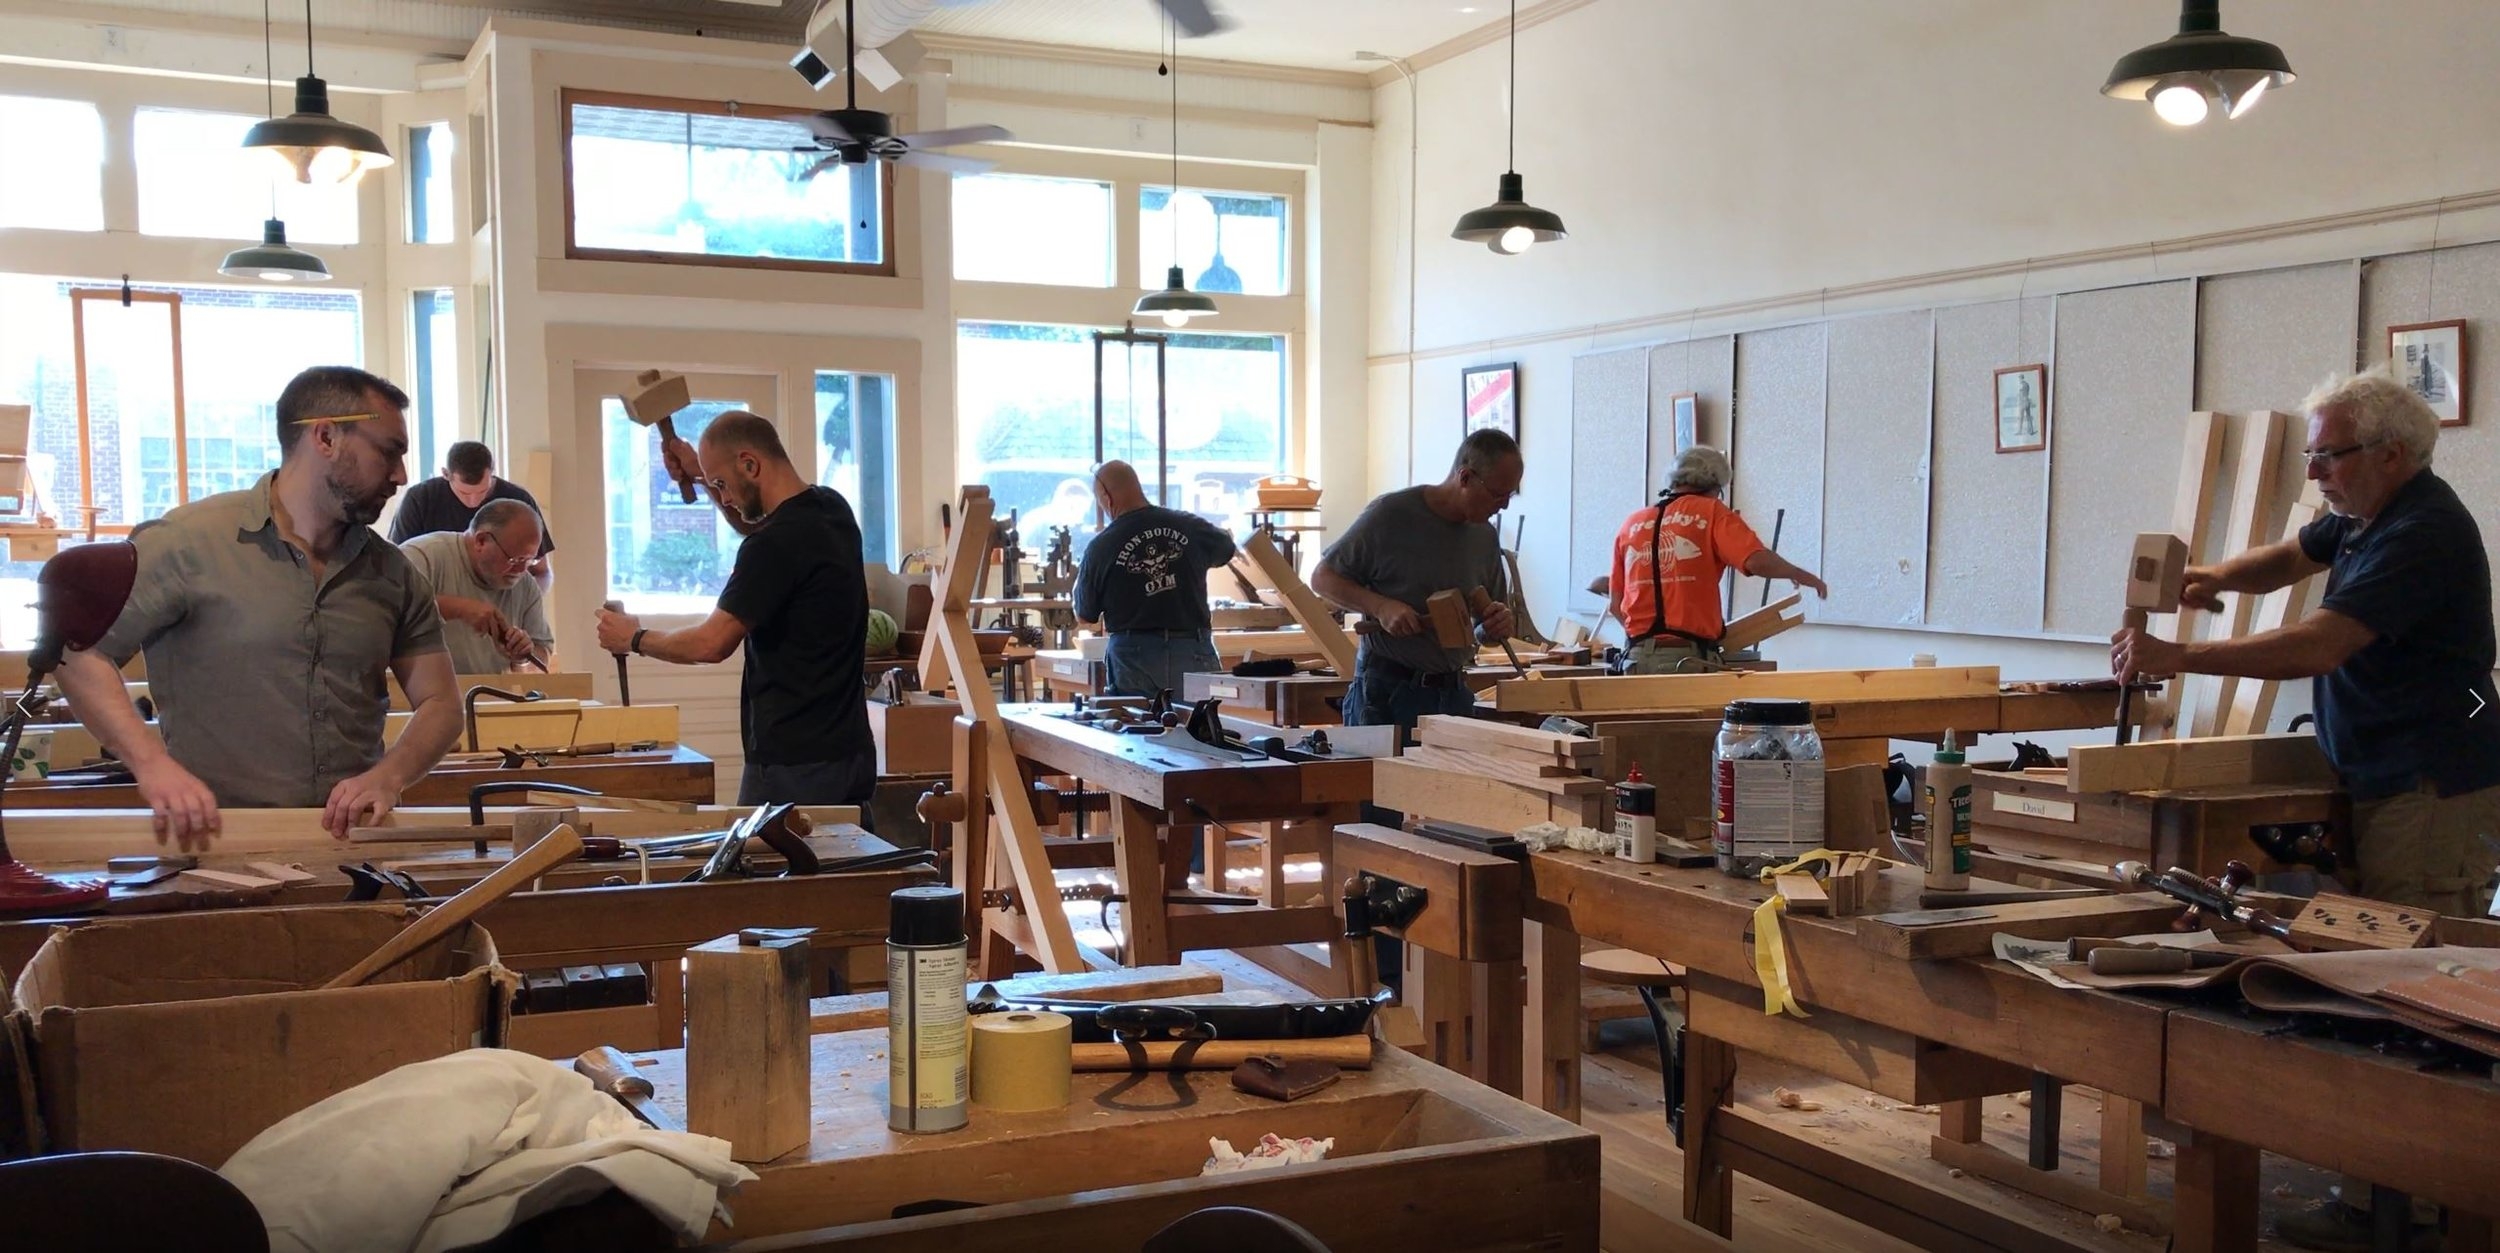
Camp "Whack-a-Chisel"...Here I am (center-left) mallet raised, pounding a chisel through a mortise. My classmates are at various stages of cutting and fitting their joints.
But that doesn’t mean that it wasn’t fun…At one point, I looked around the class, and the seven other students were all contentedly whacking away at their mortises with mallets and chisels. It was at this point that I started referring to my experience as “Camp Whack-a-Chisel,” it seemed appropriate, as basically, my only adult responsibility for the week was feeding myself and driving to and from class. The rest of the time was just contended woodworking.
The class, however, brought more than the usual level of contentment. Cutting and fitting joints is generally fun—there is something naturally fulfilling about it and it doesn’t get old. However, this project brought that joy to a new level—bigger joints, angled joints, and a tusk tenon. The tusk tenons actually hold the whole bench together. Will “warned” the class for fitting the tusk tenon was the best part of the whole class…and he wasn’t lying. The oak wedges pull long stretchers to the legs, tightly against the shoulders (if you’ve done it right). And you can’t move that sucker…it’s like it was glued and screwed by Norm Abram himself. The best part though, is that simply by whacking the other side of the wedge, you can knock the whole thing apart and take the bench wherever you want.

Here's Will demonstrating the tusk tenon (Photo by Daniel Hamden)
Another point on the bench is that, as Will points out, it’s a forgiving design. If something is off by a hair here and there, you can easily address it. Part of this flexibility comes from the hand tool approach, sure, but the bench itself does not require federal style precision—just the best you can do.
If you are interested in the bench but can't take the class, you can read more about it (from Will himself) here
Lost Art Press has written on it several times, so you can search their blog for that info...
Popular Woodworking also produced a video of the bench build, which I haven't seen...you can check it out here
If you decide to take the class, you should know a few things…these things are noted in the class description, but I’ll emphasize them here.
You won’t finish the whole bench in the class (unless something changes next time around). This doesn’t really matter though—Will shows everyone what to do and it’s just a few simple tasks to take it across the finish line. I finished my bench at home, including boring a bunch of dog holes, flatting the top, building the tool tray, and putting on a coat of oil, in less than a day.
Here's a photo of my bench, in my shop, just before I put on a coat of oil.
While the bench is mobile, it is heavy. The top alone probably weighs around 150lbs, give or take…so unless you’re a beast with huge arms, you don’t want to move it too far. This is a strong point for the bench, as it needs to be heavy enough to handle the beating you’re going to give it…and the beating future generations will give it (if you build it right). Having used mine for a few days now, I can vouch for its stoutness…planing boards, sawing boards—that sucker doesn’t move.
Finally, the class is going to be a lot of labor—you’re going to be moving heavy pieces around (although Will has organized the class so that this is kept to a minimum), swinging mallets for hours, pushing big augers, and standing on your feet...for probably about 10 hours a day. For me, this was great—I like hard work…and all that work made seeing the joints come together, and the final product too, all the more glorious.
Big takeaways:
I’ve always been drawn to handtools, but never done a whole project using them exclusively. Moreover, I’d never chopped a mortise with a chisel. This project, and the scale of the joints we did by hand, makes “normal” mortise and tenon joints look pretty easy. Yeah, I’ll probably still use the domino when it makes sense, but I have way more confidence to tackle more hand cut joints (beyond my usual dovetails).

Here we are (I'm the one in the middle) cutting our angled tenons. This is around the moment when I fell in love with Will's 4 TPI rip saw which made fast work of these 10(ish) inch long tenons. Ed, upstairs, quickly found me something similar, sharpened it, and sold it to me. (Photo by Daniel Hamden).
Most of the hand-cut joinery instruction I’ve seen has been online content. It’s good content, but it has always focused on good layout and removing waste slowly and carefully—sound instruction, sure. Will, however, teaches students how to do layout and waste removal smartly and quickly. Things like “just eyeballing” when centering a joint on a board, and then just keeping your gauge consistently on the face of the boards to keep things lined up. It was a new approach for me and it worked. It’s faster and it keeps you saner.
Finally, this was the most fun I’d had in a long time. I will make this kind of class an occasional (yearly?) treat.

Not sure what was going on here, but I was in the wood shop, with some good classmates and Roy Underhill himself. Uncle Roy probably cracked wise here, or maybe it was someone else, but this photo speaks for itself...we had a good time. (Photo by Daniel Hamden)